DIY home security has never been more accessible or effective than in 2026. With advanced wireless technology, intuitive smartphone apps, and professional-grade equipment available direct to consumers, you can install a comprehensive security system that rivals anything from traditional security companies — often at a fraction of the cost.
This complete guide walks you through every step of planning, purchasing, installing, and optimizing your DIY home security system. Whether you're protecting an apartment, starter home, or large property, you'll learn the strategies and techniques professional installers use to create effective, reliable security coverage.
Why Choose DIY Home Security?
Cost Savings
- No installation fees: Save $200-500 in professional installation costs
- Lower monitoring costs: DIY systems often offer more affordable monthly plans
- No long-term contracts: Avoid 3-5 year commitments with cancellation fees
- Equipment ownership: Keep your equipment if you move or change providers
Flexibility and Control
- Customizable coverage: Add or remove components as needs change
- Technology choice: Select from multiple brands and ecosystems
- Expansion freedom: Grow your system over time without company approval
- Self-monitoring option: Monitor your own system to eliminate monthly fees
Modern Technology Advantages
- Smartphone integration: Complete control from anywhere
- AI-powered detection: Sophisticated alerts reduce false alarms
- Smart home compatibility: Seamless integration with existing devices
- Cloud connectivity: Automatic updates and remote troubleshooting
Phase 1: Planning Your Security System
Security Assessment
Conduct a Security Walk-Through
Start by examining your home from a burglar's perspective. Walk around your property during both day and night, noting:
- Entry points: All doors, windows, garage entries, and basement access
- Blind spots: Areas with poor visibility from neighbors or street
- Hiding places: Landscaping, structures, or corners that provide concealment
- Lighting gaps: Dark areas that could provide cover for intruders
- Valuables visibility: Items visible through windows that might attract thieves
Prioritize Protection Areas
High Priority
- Front and back doors
- First-floor windows
- Garage and basement entries
- Main living areas
Medium Priority
- Second-floor windows accessible by ladder
- Side doors and patio entries
- Home office or study areas
- Detached buildings
Nice to Have
- Upper-floor rooms
- Utility areas
- Outdoor equipment storage
- Pool or recreational areas
System Type Selection
Wireless vs. Wired Systems
| Aspect | Wireless | Wired |
|---|---|---|
| Installation | Easy, minimal tools required | Complex, may need professional help |
| Flexibility | High, easily relocatable | Limited once installed |
| Reliability | Very good with quality brands | Excellent, no interference issues |
| Maintenance | Battery replacement required | Minimal ongoing maintenance |
| Cost | Lower upfront, ongoing battery costs | Higher upfront, lower ongoing costs |
Recommendation: Choose wireless for most DIY installations unless you're building new construction or doing major renovations where wire running is feasible.
Budget Planning
Typical DIY Security System Costs
- Basic system (1-2 bedroom): $200-400 for equipment + $15-25/month monitoring
- Standard system (3-4 bedroom): $400-800 for equipment + $20-30/month monitoring
- Comprehensive system (large home): $800-1500+ for equipment + $25-40/month monitoring
Essential vs. Optional Components
Essential Components
- Base station/hub ($100-200)
- Entry sensors for doors/windows ($15-30 each)
- Motion detectors ($30-60 each)
- Keypads ($50-100 each)
Nice-to-Have Additions
- Security cameras ($50-300 each)
- Smart locks ($150-300 each)
- Environmental sensors ($30-80 each)
- Professional monitoring ($15-40/month)
Phase 2: Equipment Selection
Security System Hub
The hub is your system's brain, connecting all components and communicating with monitoring services. Key features to consider:
- Connectivity options: Wi-Fi, cellular backup, landline support
- Local storage: Built-in storage for video and event logs
- Smart home compatibility: Works with Alexa, Google, Apple HomeKit
- Expandability: Supports future device additions
- Battery backup: Continues operation during power outages
Recommended: Ring Alarm Pro
Built-in eero Wi-Fi 6 router plus security hub. Excellent value with dual functionality and strong ecosystem integration.
Door and Window Sensors
These detect when doors or windows are opened and form the foundation of your system. Quality sensors should offer:
- Reliable detection: Consistent triggering without false alarms
- Long battery life: 2+ years before replacement needed
- Weather resistance: IP54+ rating for outdoor applications
- Tamper detection: Alerts if sensor is removed or damaged
- Size options: Different sizes for various door/window types
Installation Locations
- All exterior doors: Front, back, side, garage, basement entries
- First-floor windows: Especially those not visible from street
- Accessible upper windows: Near trees, decks, or other access points
- Interior doors: Home office, master bedroom, safe room
Motion Detectors
Motion sensors provide interior detection and can catch intruders who bypass entry sensors. Modern detectors include:
- PIR (Passive Infrared): Detects heat signature changes
- Dual-technology: Combines PIR with microwave detection
- Pet immunity: Ignores pets up to specified weight limits
- Adjustable sensitivity: Customize detection range and sensitivity
- Wide coverage: 90-110 degree detection angles
Optimal Placement Strategy
- Corner mounting: Maximum coverage with minimal sensors
- 8-10 feet high: Optimal detection angle and tamper resistance
- Avoid direct sunlight: Prevents false alarms from heat sources
- Clear line of sight: Unobstructed view of coverage area
Cameras and Video Systems
Security cameras provide visual verification and evidence collection. Consider your needs:
Indoor Cameras
- Common areas: Living rooms, kitchens, main hallways
- Entry points: Front door, back door, garage entry
- High-value areas: Home offices, safes, expensive equipment
Outdoor Cameras
- Perimeter monitoring: Driveways, sidewalks, property lines
- Entry surveillance: Front porch, back patio, garage
- Vulnerable areas: Basement windows, blind spots, service areas
Budget Pick: Wyze Cam v4
Outstanding 2K video quality and features at budget-friendly pricing. Perfect for DIY security on a budget.
Phase 3: Installation Process
Pre-Installation Preparation
Tools and Materials Needed
- Basic tools: Drill with bits, screwdrivers, level, measuring tape
- Detection tools: Stud finder, voltage detector for safety
- Hardware: Mounting brackets, screws, anchors (usually included)
- Connectivity: Smartphone with strong Wi-Fi signal
- Documentation: Floor plan printouts for planning
Network Preparation
- Wi-Fi strength test: Verify good signal at all sensor locations
- Network capacity: Ensure sufficient bandwidth for video cameras
- Router placement: Central location for optimal coverage
- Guest network: Consider separate network for security devices
Step-by-Step Installation
Step 1: Install the Security Hub
- Choose central location: Near router but away from interference sources
- Connect power and internet: Use ethernet connection when possible
- Download manufacturer app: Create account and register system
- Follow setup wizard: Configure basic settings and test connectivity
- Enable backup connectivity: Set up cellular or landline backup
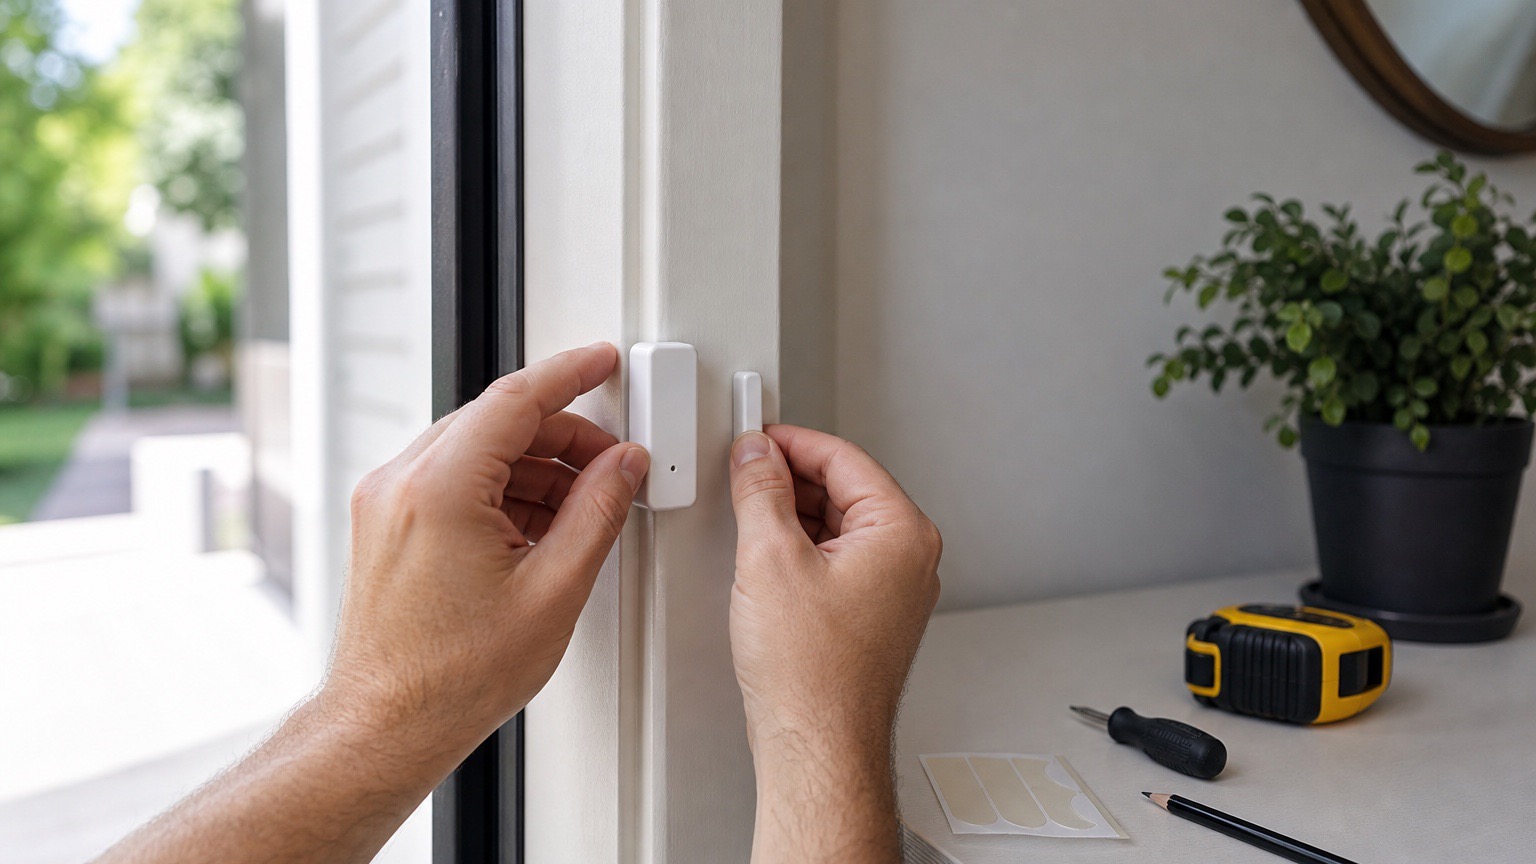
Step 2: Install Entry Sensors
- Clean mounting surfaces: Remove dirt and oils for strong adhesion
- Test fit components: Verify proper alignment before permanent mounting
- Follow gap requirements: Maintain manufacturer-specified distance between sensor parts
- Add to system: Use app to pair and test each sensor
- Label clearly: Name sensors descriptively (e.g., "Front Door," "Kitchen Window")
Pro Tip
Install one sensor at a time and test it thoroughly before moving to the next. This makes troubleshooting much easier if issues arise.
Step 3: Install Motion Detectors
- Mark mounting points: Use provided template for accurate positioning
- Check detection pattern: Verify coverage areas don't overlap excessively
- Mount securely: Use appropriate fasteners for wall type
- Adjust sensitivity: Start with medium sensitivity and adjust based on testing
- Test walk patterns: Verify proper detection from all angles
Step 4: Install Keypads
- Choose accessible location: Near main entry but not visible from outside
- Consider lighting: Ensure adequate illumination for night use
- Secure mounting: Use all provided mounting points for stability
- Program user codes: Create unique codes for family members
- Test all functions: Arm, disarm, panic button, and any special features
Camera Installation Specifics
Indoor Camera Placement
- Height: 8-9 feet for optimal facial recognition
- Angle: Slight downward tilt for best coverage
- Lighting: Avoid backlighting from windows
- Privacy zones: Configure to mask private areas
Outdoor Camera Installation
- Weather protection: Under eaves when possible
- Tamper resistance: 9+ feet high to prevent easy access
- Power planning: Route cables safely through walls
- Night vision test: Verify infrared coverage at installation height
Phase 4: System Configuration
Basic System Settings
Arming and Disarming
- Entry delay: 30-45 seconds for main entry door
- Exit delay: 60-90 seconds to leave after arming
- Arm/disarm modes: Home, Away, and custom modes
- Quick arm: Enable keypad arming without code
Notification Settings
- Push notifications: Immediate alerts for security events
- SMS backup: Text alerts when app notifications might be missed
- Email logs: Daily/weekly system status reports
- Emergency contacts: Trusted friends/family for alarm notifications
Advanced Configuration
Zone Programming
- Instant zones: Windows and non-entry doors trigger immediately
- Entry/exit zones: Main doors with delay timers
- Interior zones: Motion detectors that arm only in Away mode
- 24-hour zones: Fire, CO, and panic sensors always active
Smart Home Integration
- Voice control: "Alexa, arm the security system"
- Lighting automation: Lights activate during alarm events
- Thermostat control: Energy savings when away mode is active
- Smart lock integration: Automatic locking when system arms
Phase 5: Testing and Optimization
Initial System Testing
Component Testing
- Sensor range test: Verify each sensor detects at maximum range
- Communication test: Check signal strength and response time
- Battery level check: Verify all devices show full battery
- Tamper testing: Confirm tamper alerts work properly
Real-World Scenarios
- Simulate break-in: Test detection and alarm response
- False alarm scenarios: Check system behavior with pets, household activities
- Power failure test: Verify battery backup and cellular connectivity
- Network outage test: Ensure local operation continues without internet
Fine-Tuning Performance
Reducing False Alarms
- Motion sensor sensitivity: Adjust based on environment and pet activity
- Detection zones: Mask problematic areas like ceiling fans or heating vents
- Time-based rules: Different sensitivity levels for day vs. night
- Verification requirements: Require multiple sensor triggers for alarm
Optimizing Battery Life
- Signal strength: Ensure strong connectivity to reduce power consumption
- Update frequency: Reduce non-essential status updates
- Temperature considerations: Account for seasonal battery performance changes
- Quality batteries: Use recommended battery types for maximum life
Monitoring Options
Self-Monitoring
Best for: Tech-savvy users who want complete control and minimal monthly costs
Advantages
- No monthly monitoring fees
- Direct control over all responses
- Custom notification settings
- Privacy control over data
Requirements
- Reliable smartphone connectivity
- Commitment to respond to alerts promptly
- Emergency contact procedures established
- Backup monitoring plan for vacations/illness
Professional Monitoring
Best for: Users who want peace of mind and professional emergency response
Service Levels
- Basic monitoring ($15-25/month): Police dispatch for verified alarms
- Enhanced monitoring ($25-35/month): Includes fire and medical response
- Premium monitoring ($35-45/month): Video verification and advanced features
What to Expect
- 24/7/365 professional monitoring center coverage
- Emergency services dispatch within 5-15 minutes
- Multiple contact attempts before dispatching
- Detailed incident reports and follow-up
Ongoing Maintenance and Care
Regular Maintenance Schedule
Monthly Tasks
- Test system: Full arm/disarm cycle with all sensors
- Check battery levels: Replace any low batteries promptly
- Clean camera lenses: Remove dust and debris for clear images
- Review activity logs: Check for unusual patterns or issues
Quarterly Tasks
- Update firmware: Install manufacturer updates and improvements
- Review user codes: Change codes if needed for security
- Inspect mounting: Verify all devices are securely attached
- Test backup systems: Cellular connectivity and battery backup
Annual Tasks
- Complete system review: Assess coverage and upgrade needs
- Professional inspection: Consider third-party security assessment
- Insurance review: Update policy to reflect security improvements
- Emergency plan update: Revise response procedures and contacts
Troubleshooting Common Issues
Communication Problems
- Weak signal: Add Wi-Fi extenders or relocate hub
- Interference: Check for competing devices on same frequency
- Network issues: Restart router and verify internet connectivity
- Device isolation: Test individual components to identify problems
False Alarm Issues
- Environmental factors: Adjust for seasonal changes and weather
- Pet activity: Reconfigure sensors for pet immunity
- Household changes: Update system for new furniture or renovations
- Sensor maintenance: Clean and inspect detection devices regularly
Expanding Your System
Common Upgrades
Security Enhancements
- Additional cameras: Expand coverage to new areas
- Smart locks: Integrate access control with security system
- Environmental monitoring: Smoke, CO, flood, and temperature sensors
- Outdoor perimeter protection: Motion lights and long-range detection
Convenience Features
- Home automation: Lighting, thermostat, and appliance control
- Voice assistants: Alexa, Google, or Siri integration
- Mobile keypads: Additional control points throughout home
- Professional monitoring upgrade: Enhanced service levels
Future-Proofing Considerations
- Technology standards: Choose systems supporting Matter/Thread
- Expandability limits: Verify maximum device capacity
- Software updates: Select brands with strong update commitments
- Integration flexibility: Avoid proprietary systems when possible
Frequently Asked Questions
How much does DIY home security cost?
Basic DIY security systems start around $200-300 for a starter kit, with professional monitoring adding $20-30/month. A comprehensive DIY system typically costs $500-1500 depending on home size and features desired. This represents significant savings compared to professional installation systems.
Is DIY home security as effective as professional systems?
Yes, modern DIY systems offer the same core security features as professional systems, including 24/7 monitoring, cellular backup, and professional emergency response. The main differences are in installation complexity, customization options, and ongoing support rather than security effectiveness.
What tools do I need for DIY security installation?
Basic tools include a drill with bits, screwdriver, level, stud finder, and measuring tape. Most DIY systems include mounting hardware and detailed instructions, requiring minimal technical skill. Many components use adhesive mounting, eliminating the need for drilling.
How long does DIY security installation take?
Most basic systems can be installed in 2-4 hours, depending on home size and complexity. Simple wireless systems with adhesive mounting are fastest, while wired cameras and complex configurations may take 6-8 hours. Plan for additional time for testing and optimization.
Can I monitor my own security system?
Yes, self-monitoring allows you to receive alerts directly and contact authorities yourself. This eliminates monthly monitoring fees but requires your active response to alerts. Many users combine self-monitoring with backup professional monitoring for vacations or emergencies.
What happens if my internet goes down?
Quality DIY systems include cellular backup connectivity that maintains monitoring and alerts even without internet. Local sensors continue functioning, and the system can store events locally until connectivity is restored. Battery backup ensures operation during power outages.
Conclusion: Your Path to Effective DIY Security
DIY home security in 2026 offers unprecedented accessibility, effectiveness, and value. By following this comprehensive guide, you can create a professional-grade security system tailored to your specific needs and budget. The key to success lies in thorough planning, quality component selection, careful installation, and ongoing optimization.
Remember that security is an ongoing process, not a one-time installation. Regular testing, maintenance, and system updates ensure your investment continues protecting your family and property effectively. Start with essential components and expand over time as needs and budget allow.
Most importantly, don't let perfect be the enemy of good. A basic DIY security system installed today provides far better protection than the most sophisticated system you haven't installed yet. Begin with core components like entry sensors and motion detectors, then add cameras, smart locks, and advanced features as you become comfortable with the technology.
Your home's security is ultimately your responsibility, but modern DIY systems make it easier than ever to take control and create the protection your family deserves.
Last updated: January 18, 2026. Technologies and recommendations subject to change.